How to get a free unlimited VSTS build server

Did you know Visual Studio Team Services (formerly known as TFS) are great? Just two years ago I wouldn't consider it as my automation platform because frankly there were better players on the market, including Jenkins and TeamCity however I can't see a reason to use anything else now. It doesn't lack common sense anymore, it's open to any platform, extensible, friendly. In terms of automation it has support for both builds and releases where usually you had to have two different products before.
Worth mentioning it doesn't just build Windows software, but anything else. I release Android and iOS software, both frontend and backend systems, Linux or Windows, C# or Java, Scala, node.js or anything else. It just works.
But the best part is it's free. Free as like a beer and not a puppy. Free for 5 users and 240 build minutes a month. Ideal for personal and small projects, and even tiny startups.
If you need more users you can buy licenses which is understandable. If you need more build/release minutes you need to purchase them additionally. And you have two fair options here:
- Get a cloud hosted build server with no limitations for around �28 ($40) a month
- Get your own private agent (which is basically your own VM) connected to your account to perform the builds, for free. Of course you have to pay for the actual VM hosted elsewhere, however frankly most of us will have one or two unused or barely used resources hanging elsewhere which can be utilised.
In this post I'll describe how to configure the free build server. I'll be using a Windows based server because it's more universal for my purposes (it can build classic .NET or .NET Core, Java, Scala or whatever) unlike Linux.
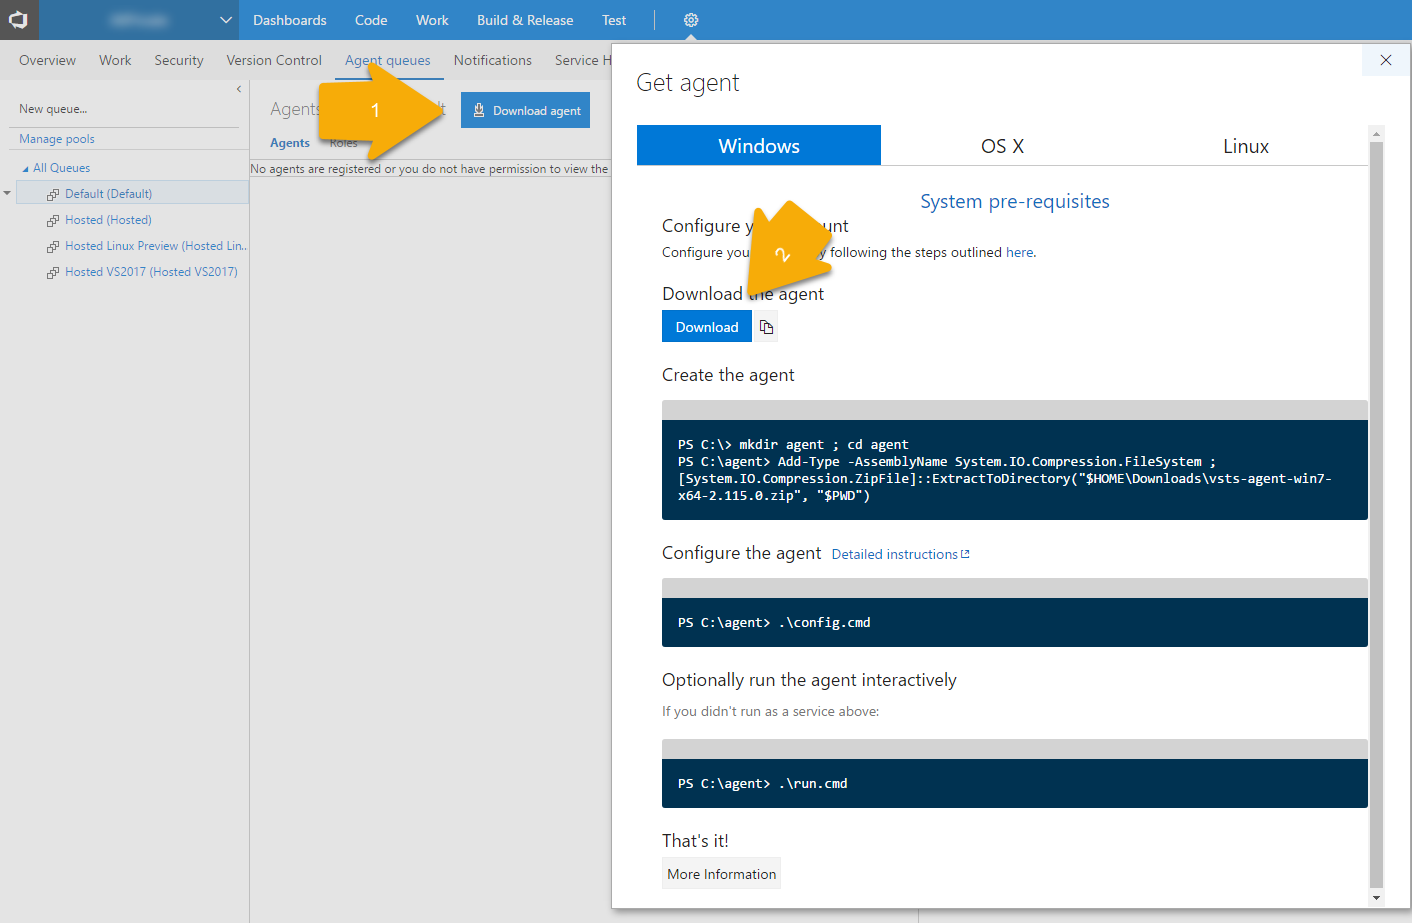
First of all, click on the "gear" icon and go to the Agent Queues.

This is where you configure where the builds are actually running. Free (240 minute) builds will be in Hosted queues, as well as any agents you will purchase additionally. I'm going to add a new agent (an agent is essentially a machine which is responsible for running build/release tasks) into the Default queue. Click on the Default queue, Download agent and Download.
Instead of pressing the download button I'll copy the link to clipboard and download it on the target VM:

Once done, open PowerShell in Administrator mode and type:
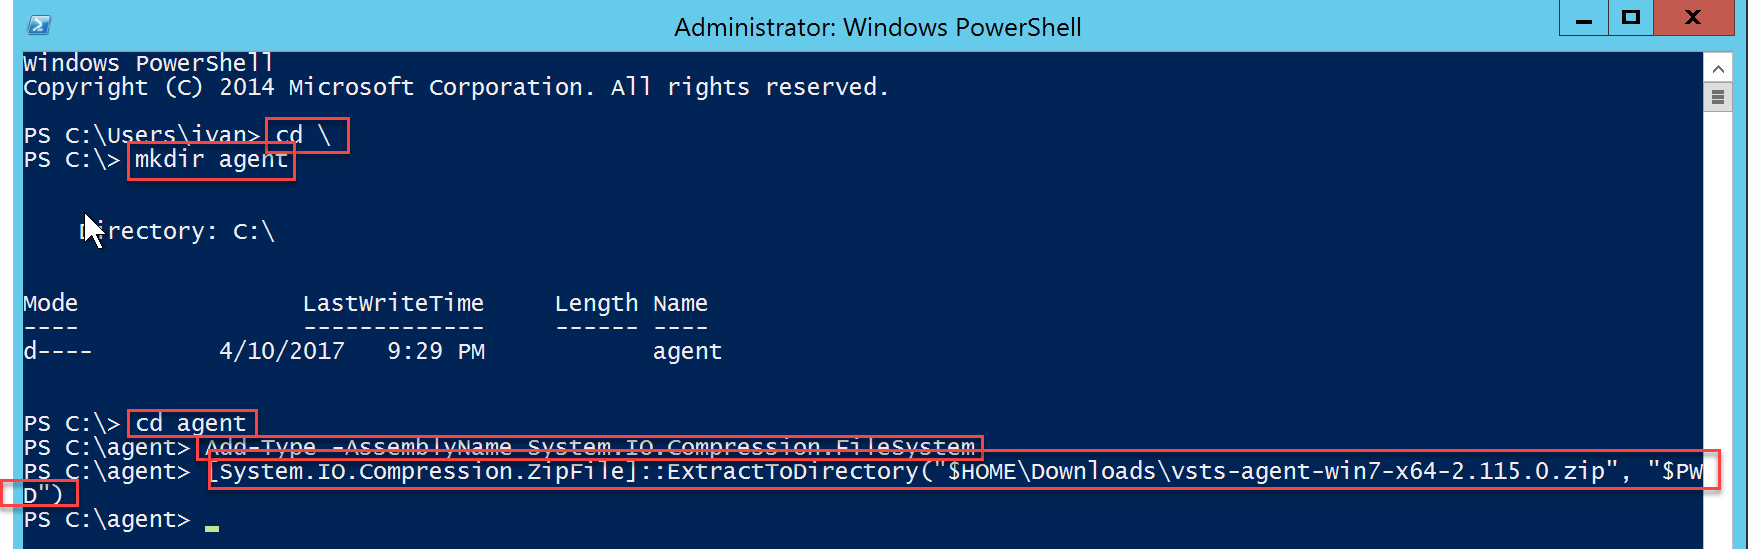
Which basically extracts the file from default downloads directory to your current one. Once done just run .\config.cmd:
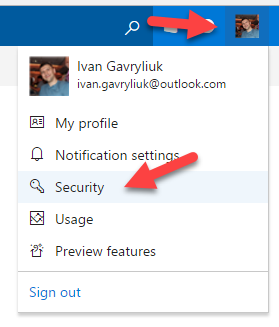
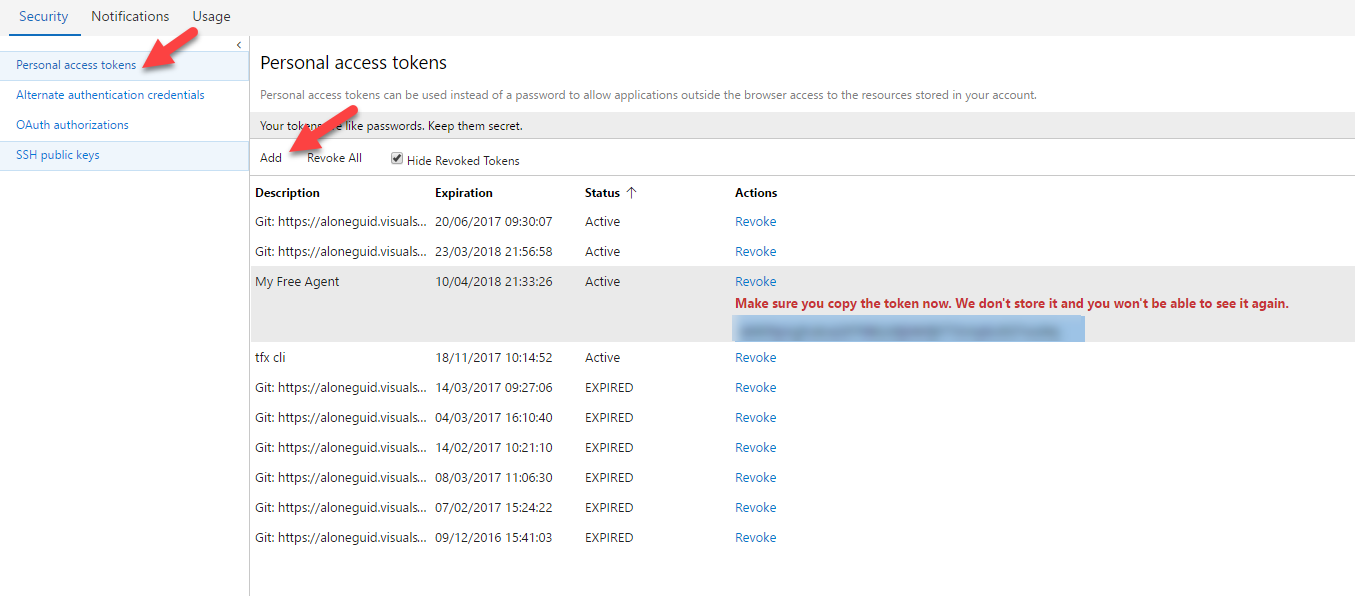
This will ask you for a series of questions, but when asked for authentication leave it as PAT (default). PAT stands for Personal Access Token which you can obtain from VSTS by going to security in top-right corner
and addin it from the left tab
Your free build server is ready! Now if you go back to Agent Queues your agent should be listed there:

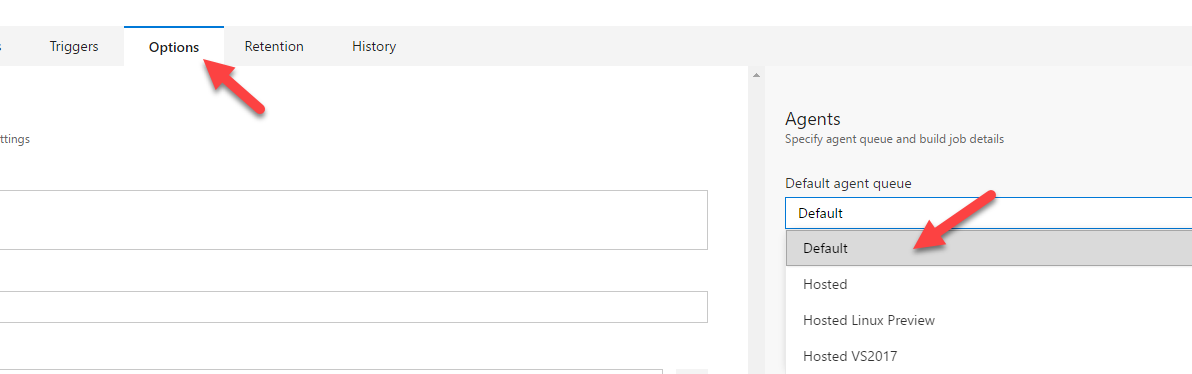
The last thing to do to use it is to edit your project and choose Default agent queue in options:
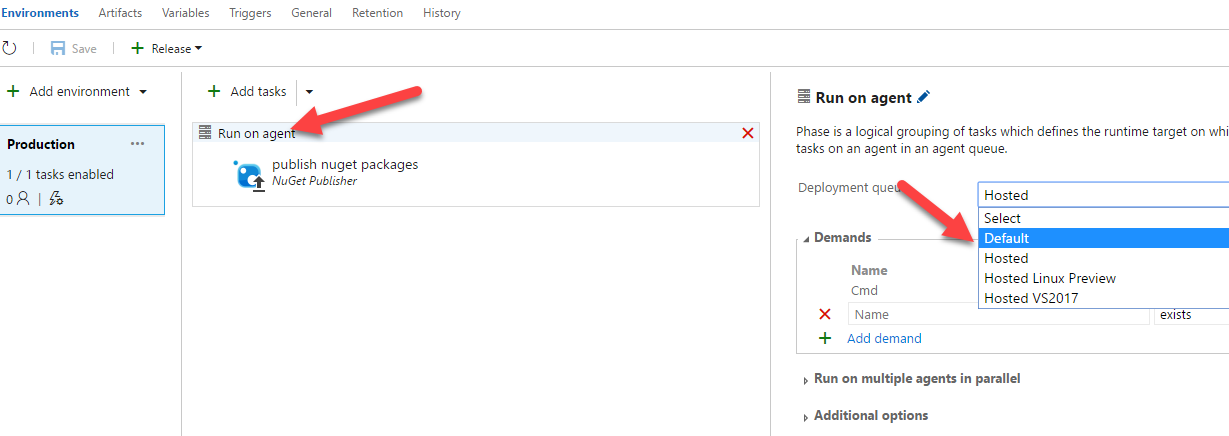
For releases this option is under tasks tab:
Have a free build server and don't forget to automate everything!
Thanks for reading. If you would like to follow up with future posts please subscribe to my rss feed and/or follow me on twitter.