Setting up FTP server on Microsoft Azure

Microsoft Azure doesn't have a managed FTP service, which I needed today to simulate integration with legacy systems. However, it's really easy to set up by yourself. All you need to do is create a Ubuntu VM, even A0 instance is enough, and it costs something like £8 a month. If you are cheap like me, you can even run more stuff on that VM to justify the costs.
The first thing you can do is create that VM, apprently.
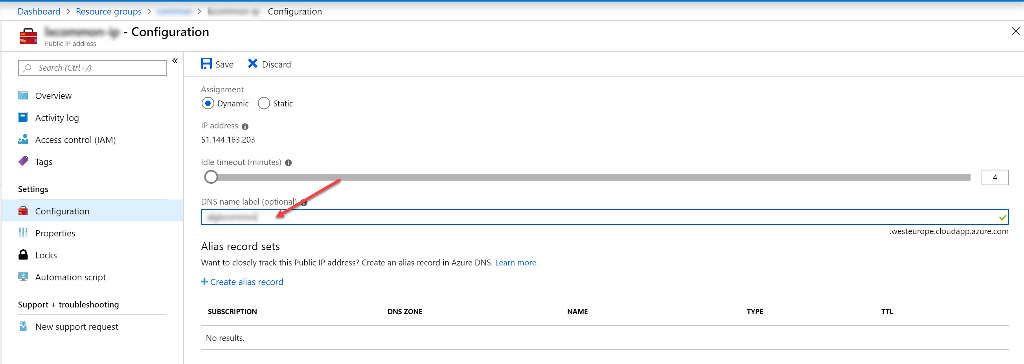
You will get an IP address, but I like giving DNS labels to my machines, so if IP changes, I can not care about it. This can be changed in Configuration tab of a VM:
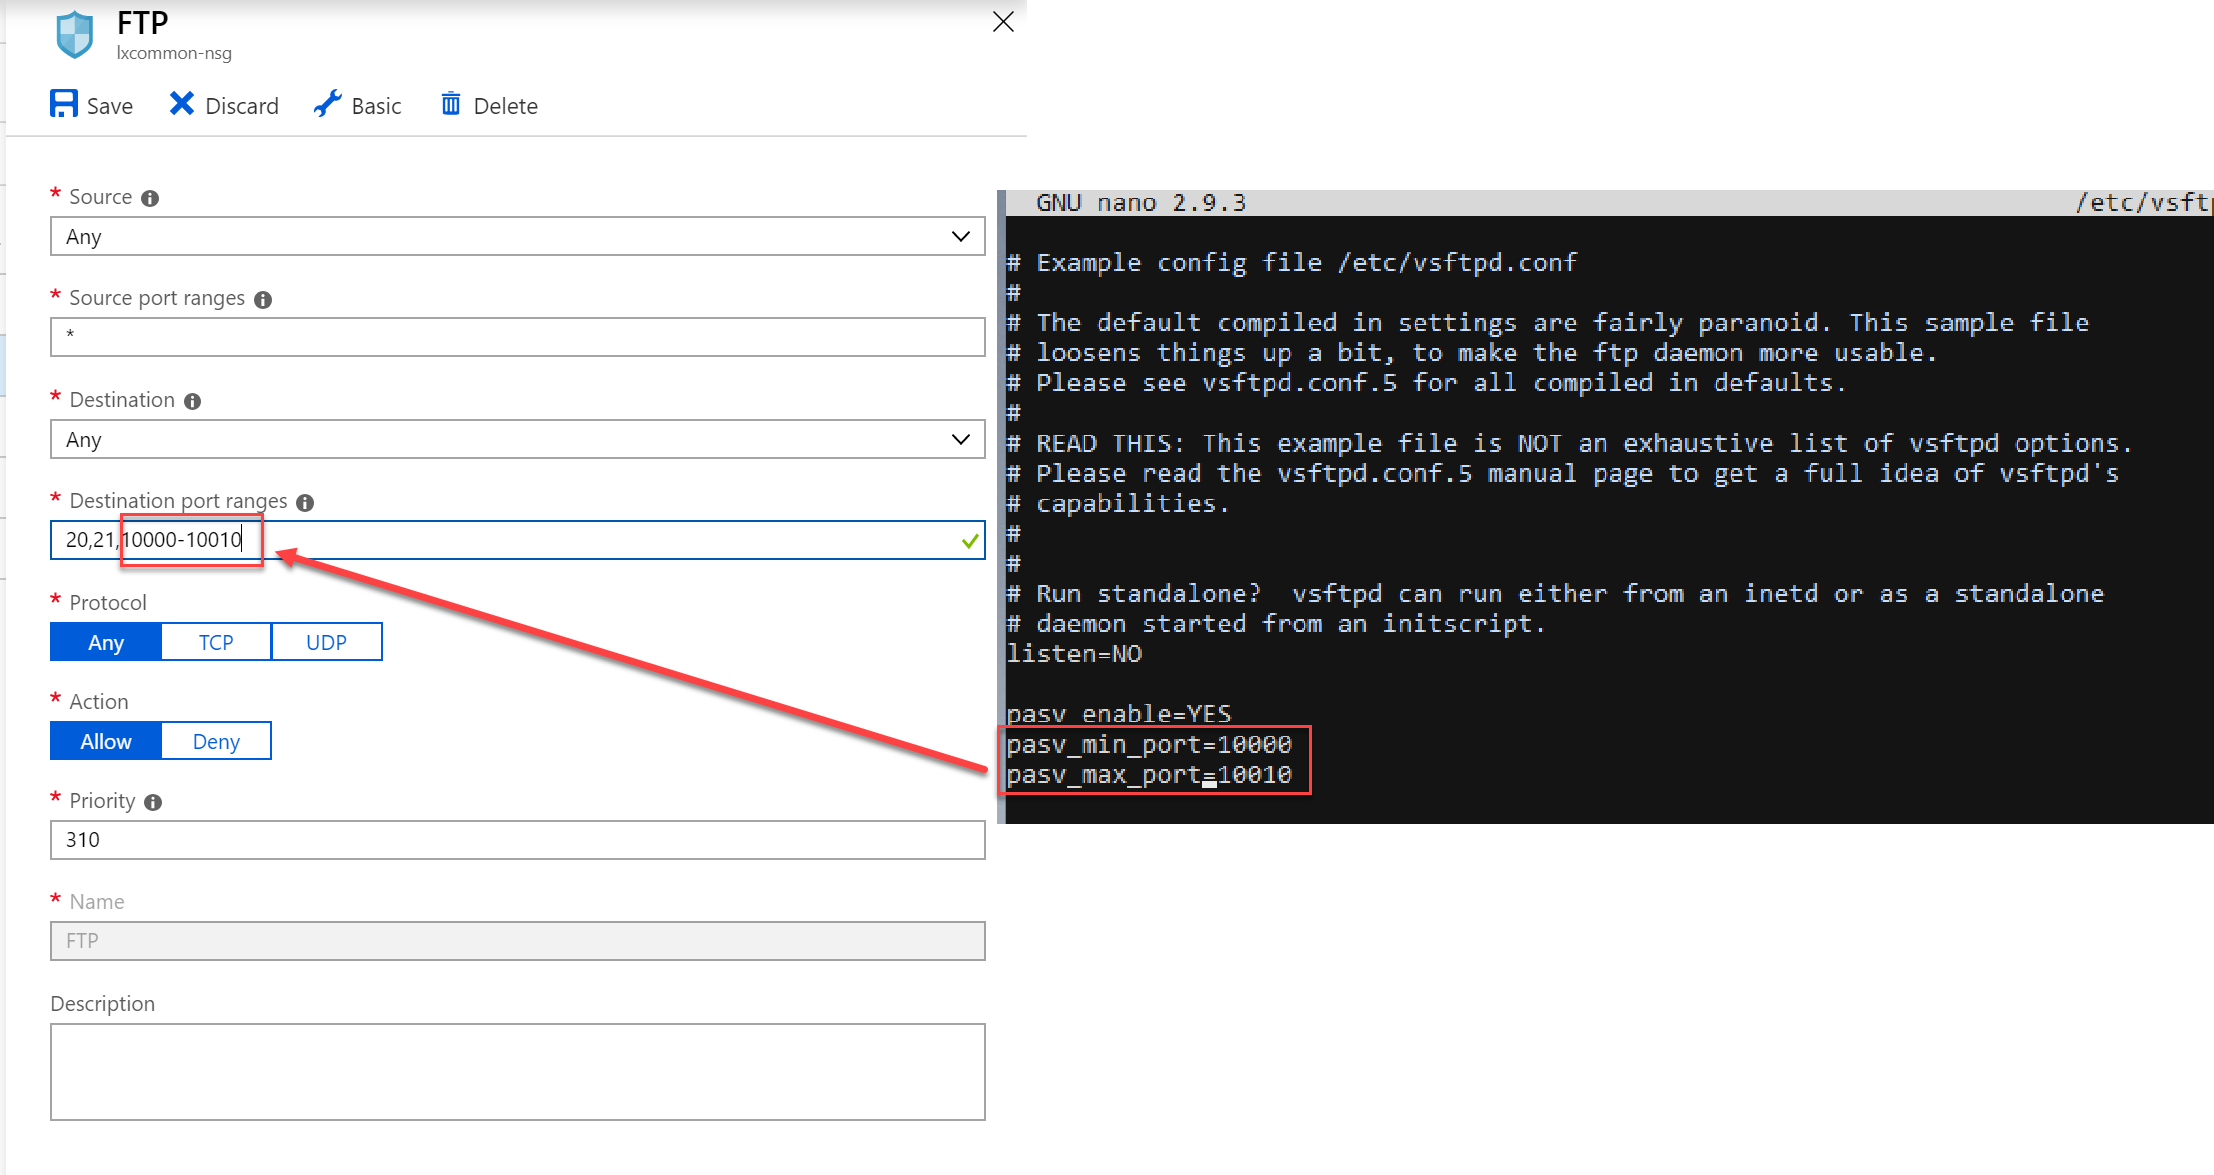
In addition to that, you need to open firewall ports in Network Security Group configuration for your FTP service, the ports are the following:
- 21 - command port
- 20 - data port
- 10000-10010 - for FTP passive mode. I chose these numbers randomly and you can customise them to different numbers.
Once done, SSH to your VM and it would be a good idea to run
sudo apt update
sudo apt upgrade
before isnstalling anything. Then just install vsftpd (stands for Very Secure FTP Daemon):
$ sudo apt install vsftpd
After it's installed, you need to change it's configuration, because by default nothing works in Linux - sudo nano /etc/vsftpd.conf
Uncommend the following:
- Allow local users to log in:
local_enable=YES - Allow writing to FTP:
write_enable=YES
Now we want to allow access for this machine's users to their home directory, therefore search for chroot_local_user and make sure it looks like this:
chroot_local_user=YES
user_sub_token=$USER
local_root=/home/$USER/ftp
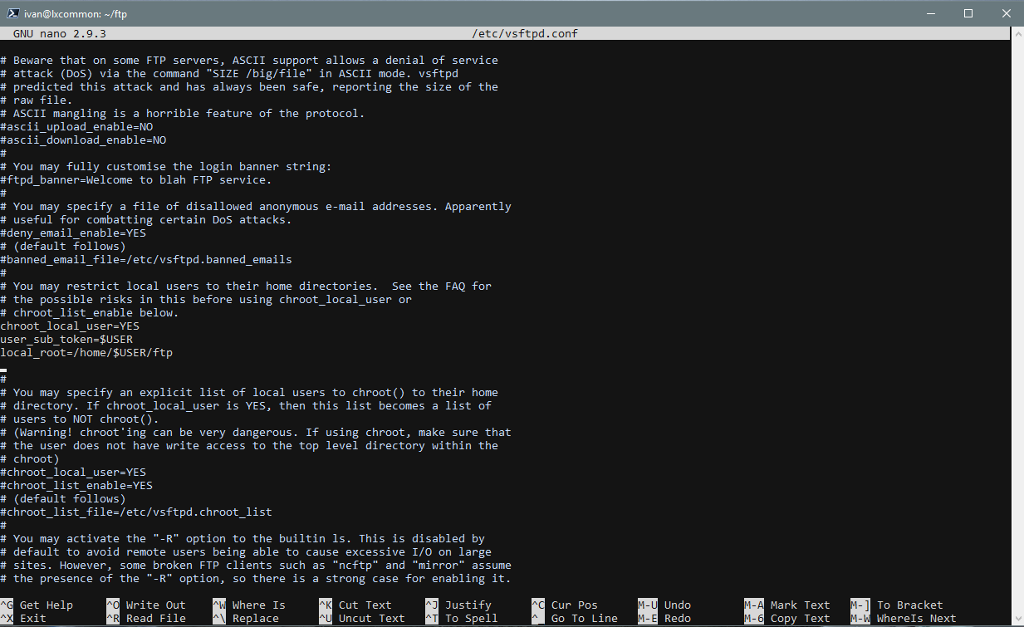
It essentially says that local users are allowed to log in, and their home folder will be called ftp. Therefore you need to create one - mkdir ftp from your home folder.
Next, enable passive mode by inserting these lines anywhere in the config file:
pasv_enable=YES
pasv_min_port=10000
pasv_max_port=10010
Also add seccomp_sandbox=NO because of a rare "feature" workaround in some linux distros. And allow user's home folder to be writeable - allow_writeable_chroot=YES
The whole custom section should look like this:
pasv_enable=YES
pasv_min_port=10000
pasv_max_port=10010
seccomp_sandbox=NO
allow_writeable_chroot=YES
The pasv settings are enabling FTP passive mode and specify allowed port ranges, which should be the ports you open in NSG:
Once it's all done, just restart vsftpd - sudo systemctl restart vsftpd.
You can now connect to your ftp server with a favourite FTP client, like WinSCP.
Tip
If during configuration you've screwed up the configuration file somehow and want to restore the original configuration, you can uninstall vsftpd by issuing command sudo apt remove vsftpd --purge. Note that purge flag is important - by default Ubuntu package manager doesn't remove configuration.
Thanks for reading. If you would like to follow up with future posts please subscribe to my rss feed and/or follow me on twitter.